Showing posts with label print servers. Show all posts

D-Link DP-300U 10/100TX 1-USB Port 2-Parallel Port Print Server Review

D-Link DP-300U 10/100TX 1-USB Port 2-Parallel Port Print Server
Average Reviews:

(More customer reviews)
First I tried the NetGear PS101 print server. I liked the spiffy form factor. I could talk to the print server admin web interface and get it to print a test page, but even after many, many hours could never get it to print a document. So I returned it.
After that debacle, I decided to splurge for the HP JetDirect. At first I could only get it to print the configuration page. A visit to the HP support forums turned up lots of references to the JetDirect not working with SP2 and the suggested solution was to uninstall SP2. Ugh. Finally I went to the D-Link web site and copied the D-Link installation guide for XP w/SP2. The main difference was that D-Link suggested installing the print server as a local TCP/IP printer instead of a networked printer and, bingo, I got the JetDirect to print. (NOTE: It still goes over the network, it just looks local to the PC.) However I was miffed that I paid double the price for a device which required a competitors documentation to get to work. In addition, DHCP didn't work and I could never get it to show up in my network neighborhood.
So ... in a possibly nonsensical move of principle and price, I bought the D-Link DP300U and set up it. It's not trivial to install, but after working with the other two devices, a couple hours of install time seems like nothing. Here are a couple tips ...
(1) Do NOT use DHCP. Use a fixed IP address. Unlike the JetDirect, DHCP works. However, it still didn't show up in my network neighborhood and now I didn't know the IP address. There is NO HARDWARE RESET on the device. The D-Link support guy was great. He told me that if I couldn't find the IP address, I would have to send it back to D-Link to be reset (Ugh!). The good news is that he told me how to find it. I went to the router and looked at the DHCP assignment list and got it, and then reset the thing to a nice, fixed IP address in my subnet.
(2) I first set it up as per the instructions as a local TCP/IP printer, which means it's still on the network but looks like a local printer to the PC. It worked OK, but did this weird, long pause ... about a minute ... right in the middle of long documents. Again D-Link support was good. They told me to try setting it up as a networked printer, which I did. Unfortunately, this doesn't have spooling and you're back to 1980's wait-for-printing. Then something weird happened that I can not explain ... after setting up the device as a networked printer, I went back to the local TCP/IP printer that I had set up and it worked perfectly. Don't know how it got fixed.
My PC is a Dell laptop w/ wireless connection to an access point, and then wired to a router and the print server. My printer is an HP Deskjet 5550.
So, in the end I'm sticking with the D-Link product and I am happy with it. I would have rated it 3 stars as an overall product, but bumped my rating to 4 stars because I still thought it was the best of the ones I had tried. The itty-bitty-print-server market could use some improvement.
Enjoy!

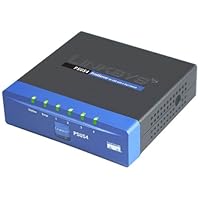
Click Here to see more reviews about: D-Link DP-300U 10/100TX 1-USB Port 2-Parallel Port Print Server

D- Link the industry pioneer in networking continues to offer innovative products in Ethernet. The D- Link DP- 300U is a compact print server that connects to your Ethernet or Fast Ethernet network. With high-speed ports DP-300U allow users to print simultaneously from anywhere on the network. DP-300U is equipped with two IEEE1284 parallel ports and one USB version 1.1 port for seamless connection tomost printers available on the market today. DP-300U also supports all major network Operating Systems and protocols. With its compact size DP-300U can easily be placed anywhere! DP-300U is also easily configurable using web browser or window based configuration program. Using web browsers on a PC connected to the network configuration is simple and straightforward with the familiar D-Link interface. PS Admin a Windows based configuration program can also be used to configure DP-300U. The DP-300U print server is the ideal network printing solution for small offices home offices schools and other businesses that requires printer sharing. Primary InformationNetworking Type:Print serverForm Factor:ExternalNetworking Interface:USB; ParallelData Transfer Rate:100 MbpsData Link Protocol:Ethernet; EtherTalk; Fast EthernetConnectivity Technology:WiredRemote Management Protocol:SNMPCabling Type:Ethernet 10BASE-T; Ethernet 100Base-TXWidth:4.6 InchDepth:7.59 InchHeight:1.22 InchService & Support Type:1 year warrantyUNSPSC CodeUNSPSC Code:43201537Product IDUPC:790069251139Manufacturer Part:DP-300U

Buy Now

Click here for more information about D-Link DP-300U 10/100TX 1-USB Port 2-Parallel Port Print Server

Read More...

Cisco-Linksys PSUS4 PrintServer for USB with 4 Port Switch Review

Cisco-Linksys PSUS4 PrintServer for USB with 4 Port Switch
Average Reviews:

(More customer reviews)
Like a number of the other reviews mentioned, the PSUS4 works fine as a printserver but the included setup software isn't worth even removing from the box. I am by no means a networking expert but I had the time to tinker with the device and found that you really need to be ready to configure the PSUS4 directly using your browser and then configure each computer for local printing by creating a new TCP/IP port using the IP address of the unit and configuring it for printing to "USB1". If this sounds complicated it really isn't and with a bit of searching you can find quick and easy instructions from an article on the Linksys website (note the lack of mentioning USB1 in the article).
Long story short, don't buy this if you want plug and play but if you have a basic understanding of networking you will find this works fine after a bit of a painful initial setup. I found that it took much longer just to find the information I needed than actually setting up the unit.

Click Here to see more reviews about: Cisco-Linksys PSUS4 PrintServer for USB with 4 Port Switch

Share your USB printer and expand your network with one compact box The Linksys PrintServer for USB with 4-Port Switch is a double upgrade for your network. First, it lets you connect a USB printer directly to your network, eliminating the need to dedicate a PC to print serving chores. Using a PrintServer frees up your print share PC so you dont have to leave it on all the time. It also removes the printing bottleneck, and sets your PC free to do more useful work. In addition, the PrintServer includes a 4-port 10/100 switch, so you can easily add more devices to your network. All four ports are auto speed negotiating, and have automatic MDI/MDI-X crossover detection, so you dont have to worry about the cable type.

Buy Now

Click here for more information about Cisco-Linksys PSUS4 PrintServer for USB with 4 Port Switch

Read More...

D-Link DP-301U 10/100TX 1-USB Port Print Server Review

D-Link DP-301U 10/100TX 1-USB Port Print Server
Average Reviews:

(More customer reviews)
Check this site to see if it is compatible:
http://support.dlink.com/faq/view.asp?prod_id=1263&question=DP-300U%20/%20DP-311U%20/%20DP-301U%20/%20DI-704UP%20/%20DI-824VUP%20/%20DP-311U_revB


Click Here to see more reviews about: D-Link DP-301U 10/100TX 1-USB Port Print Server

D-Link DP-301U 10/100TX 1-USB Port Print Server

Buy NowGet 35% OFF

Click here for more information about D-Link DP-301U 10/100TX 1-USB Port Print Server

Read More...

D-Link DP-301P+ 10/100TX 1-Centronic Port Print Server Review

D-Link DP-301P+ 10/100TX 1-Centronic Port Print Server
Average Reviews:

(More customer reviews)
Works fine. set up three of them on my network. 3 XP Pro computes computers and one running Win 98SE. Need to change the defauld IP addresss on each additional DP-301P+ after you use the default ip address for the first one (using the web browser to access the units ). For win 98 you have to go read the manual on the CD (a .PDF file) for installing on win 98, and ME ect..and run the included software to install the print client for the network. On win XP all you have to do is set the IP address, look at the port name in the configuration screen, and then use the win XP "install printer wizard" using the ip addrss and port name per the instructions.. I.E. the guy below who could not install it using ME apparantly did not read the Manusl on the CD for specific instructions for installing on a Win 98, or ME computer ..nor did he run the software needed to make it work on Win 98 or ME.

Click Here to see more reviews about: D-Link DP-301P+ 10/100TX 1-Centronic Port Print Server

D-Link DP-301P+ 10/100TX 1-Centronic Port Print Server

Buy NowGet 25% OFF

Click here for more information about D-Link DP-301P+ 10/100TX 1-Centronic Port Print Server

Read More...

NETGEAR FWG114P ProSafe 802.11g Wireless VPN Firewall 4-Port 10/100 Switch with USB Server Review

NETGEAR FWG114P ProSafe 802.11g Wireless VPN Firewall 4-Port 10/100 Switch with USB Server
Average Reviews:

(More customer reviews)
I've applied the new flash upgrade, and performance is still quite good. Most of my comments from January still apply. Setup is quick, Citrix & terminal services work without modification, and I can connect to my main office via Cisco VPN client. Games are still working too.
As with most vendors, I suspect you'll have better compatibility if you use a Netgear WiFi NIC with this unit. I can get it to work with a Cisco Aironet NIC, but I cannot get WPA encryption to work. WEP (for what it's worth) works, but I'll probably have to spring for the corresponding Netgear NIC if I want to move to WPA.
The print server took a hit with the flash upgrade, however. Now it will only work as long as the PCs using it never reboot. If they do, you lose the connection to the print server until the firewall is rebooted. Tech support has been, um, less than helpful in resolving the issue. For that reason, my rating still stands at 4 stars. I strongly recommend you check the printer compatibility list on Netgear's site before you count on this as a print server.
A couple of other notes:
- The firewall is solid. I'm a networking guy, and I've tried to hack my way in a couple of times. Nothing's perfect, but this is a good solution in the home or very small business market. The worst I've been able to do against this unit is a denial of service, which disabled the Internet connection to my home network until I rebooted the unit.
- If you plan to use MSN Messenger 6.2 and/or Windows XP's Remote Assistance, you'll need to enable UPnP on this unit, which is a bit annoying, but more of a Microsoft issue.
- The e-mail logging is VASTLY improved over that of the previous flash. My logs are much more manageable, and the number of false-positive security alert messages is minimal.
- You can now create up to two remote access VPN tunnels with the new flash. I tried it and it works, although as a home user I can't imagine ever needing that feature. Difficult to set up, though, so unless you have a solid understanding of IPSEC VPN protocols, good luck.
Still, I believe this is a good unit for a home office. For me, combining the functions of print server, wireless access point, and hardware firewall into a single device make it worth the price.

Click Here to see more reviews about: NETGEAR FWG114P ProSafe 802.11g Wireless VPN Firewall 4-Port 10/100 Switch with USB Server

The NETGEAR FWG114P ProSafe 802.11g Wireless VPN Firewall 4-Port 10/100 Switch with USB Server is a mouthful to say but provides your business with a router, switch, print server, wireless access point, and firewall. Instead of multiple devices and a tangle of wires, the FWG114P is all you need.
Wired and Wireless Connectivity The FWG114P can connect up to 253 users onto the LAN, including 64 wireless users, to share a single broadband connection. Built in to the router is a 4-port 10/100 switch for up to four connections, as well as an 802.11g wireless access point. The wireless network supports speeds up to 54 Mbps and there is a detachable 5 dBi antenna included.
A USB port allows you to connect a printer to the network that multiple users can share simultaneously. An RS-232 serial port provides a backup connection in case the main network connection fails. A row of LED lets you know the status of the network at a glance.
High-class Security For more security than just a simple NAT router, the FVG318 offers significantly more protection. It provides: a Stateful Packet Inspection (SPI) firewall to prevent Denial of Service attacks, an Intrusion Detection System (IDS), the ability to block Java/URL/ActiveX based on extension, and FTP/SMTP/RPC program filtering.
The FWG114P supports two simultaneous VPN tunnels to protect links between remote locations, encrypting the data between them. The wireless network is protected by 40/64-bit and 128-bit WEP encryption as well as WPA.
Easy Setup Even with all the functionality the FWG114P provides, NETGEAR makes setup a breeze with the intuitive Smart Wizard that automatically detects the ISP connection and adjusts your configuration accordingly.
The NETGEAR FWG114P ProSafe 802.11g Wireless VPN Firewall 4-Port 10/100 Switch with USB Server is backed by a 3-year warranty.
What's in the Box FWG114P, AC power adapter, ethernet cable, installation guide, resource CD, warranty/support information card.

Buy Now

Click here for more information about NETGEAR FWG114P ProSafe 802.11g Wireless VPN Firewall 4-Port 10/100 Switch with USB Server

Read More...

TRENDnet 3-Port Print Server TE100-P21 (Blue) Review

TRENDnet 3-Port Print Server TE100-P21 (Blue)
Average Reviews:

(More customer reviews)
After unpacking the print server I was up and printing within 15 minutes on both printers from both computers in my network. It took me a couple of minutes to get the utility "PS-Utility" to see the print server by disabling the Windows firewall and then discovering that I could add the utility to the exceptions list in order to enable to firewall again. I am able to access all printer specific functions through the drivers as if the printers were connected directly to the computer.
It has been a couple of days and I have had no problems.
Configuration:
-Operating System: Windows XP Professional and Windows XP Home.
-Router: Linksys WRT55AG
-Print server: TRENDnet TE100-P21
-Dell XPS Gen 3 Desktop connected to router via enet cable.
-Dell Lattitude laptop connected to router via wireless link.
-Printers: Cannon IP5000 to USB1 and HP Laserjet 5L to LPT3 of the print server.


Click Here to see more reviews about: TRENDnet 3-Port Print Server TE100-P21 (Blue)

TRENDnet TE100-P21 is a Fast Ethernet print server that transforms a stand-alone USB or Parallel printer into a shared network printer. The TE100-P21 is compatible with 10Mbps or 100Mbps Ethernet network and it has two USB 2.0 and one Parallel printer port. Network professionals can easily manage the print server using Web Browser and utilize the TE100-P21 to promote productivity in a workgroup environment with low equipment cost.

Buy NowGet 27% OFF

Click here for more information about TRENDnet 3-Port Print Server TE100-P21 (Blue)

Read More...

Buffalo Technology Network USB 2.0 Print Server LPV3-U2 Review

Buffalo Technology Network USB 2.0 Print Server LPV3-U2
Average Reviews:

(More customer reviews)
Although I've never heard of Buffalo Technology before (http://www.buffalotech.com) I decided to purchase this product because there was at least some confirmation from others that it would work with Apple OS X. Linksys was my first choice but they don't claim any Mac support at all for their PSUS4 server so I gave up on them.
Anyway when this product arrived I was determined to install it using only my Mac and not resorting to one of my Windows systems because it seemed that most people were having difficulties on the Mac side. The manual section for Mac is completely wrong, so ignore it. Here's what I did:
1. Unpack, plug in to printer, network and lastly plug in the power.
2. I have a DHCP server in my network router which for me means devices get assigned IP addresses from a pool starting with 192.168.0.xxx. Go to your router configuration web page and find the address of the print server device. If you don't have a DHCP server the device will be at IP address 192.168.11.222 according to the manual.
3. Bring up Safari and type in the address, e.g. http://192.168.0.123. It will ask you for a username/password. The username is 'root' and the password is empty by default. If you see the printer configuration page then you have confirmed the device is working. You can come back to this page to mess with settings if you know what you are doing.
4. Go to System Preferences, click on Print & Fax. Click on '+'. I'm running OS X Leopard which shows a window with a toolbar with a Default button on the left. You should see 'P1' in the list of printers.
5. Ignore the default setting for 'Print Using' and look for the closest match to your printer in the list of Gutenprint drivers. I have a Canon PIXMA iP3500, so I selected 'Canon PIXMA iP3100'
6. Close the Preferences windows and open TextEdit. Type something in an select File Print... and press Print. You should see the Print Queue window and after a few seconds you should see your document print.
Piece of cake! On the Windows side of things don't bother installing the supplied software. It just confuses things. Unlike the Mac installation you couldn't do the Windows one without consulting the manual. Sadly, Windows has became a torturous maze of dialog boxes. Ready? On Windows XP do the following:
1. Go to Control Panel, Printers and Faxes, Add Printer... then click Next
2. Select Local Printer (don't ask) and uncheck the 'Automatically detect (blah)' option
3. Select 'Create New Port', then 'Standard TCP/IP Port'.
4. Next wizard... Type in the IP address from above, and then type over the printer port/name that got unhelpfully filled in for you (remember it is P1 by default)
5. On the next page select 'Generic Network Card'. Yes, I was shaking my head at this point too.
6. After clicking OK on the next very big message box, and a brief intermission, select your printer driver.
7. Print a test page and if all is well you should be up and running.
Despite the nuttiness of the operating systems this is a great device. I hope the company comes through it's current legal troubles and continues to produce great products like this.

Click Here to see more reviews about: Buffalo Technology Network USB 2.0 Print Server LPV3-U2

MODEL- LPV3-U2VENDOR- BUFFALO TECHNOLOGY FEATURES- Network USB 2.0 Print Server Compatible with any USB-enabled printer the Buffalo Network USB 2.0 Print Server offers a simple solution for adding a printer to your network. You can save valuable time space and resources by easily accessing your printer attached anywhere on your 10/100 network. Easy installation via web browser Internet Printing Protocol support and the remote management utility allow you to control and print your jobs from anywhere. Increase your productivity andmaximize your performance with this easy to use and operate print server. * Share USB Printer with Everyone on a Network* Simple and Quick Installation* Print Out Files and Pictures Remotely * Manage Through Web Browser or Using Software Tool* Works with Most OSs Web Browser Configuration (Please check with the printer manufacturer to ensure they provide the drivers that support network printing).* Easy Setting with Utility Software or WEB Setting* Supports USB 2.0 and 1.1* Supports 10/100 Network* Auto-Negotiation and LAN Port* Supports IPP (Internet Printing Protocol)* Supports TCP/IP NetBEUI Rendezvous -SPECIFICATIONs INTERFACE - USB 2.0 and USB 1.1 IEEE802.3u (100 Base-TX) IEEE802.3 (10 Base-T)CONNECTORs - (1) RJ-45 port (1) USB 2.0/1.1 port (Type A)TRANSMISSION ENCODING METHOD-100BaseTX: 4B5B MLT-3 10BaseT: Manchester CodingACCESS METHOD- CSMA/CDPOWER- 5.0 volt 500 mA ConsumptionSIZE - 3.7" x 1.1" x 2.6" WT.- 3.2 oz.

Buy NowGet 4% OFF

Click here for more information about Buffalo Technology Network USB 2.0 Print Server LPV3-U2

Read More...

Netgear FR114P Firewall Cable/DSL Router with Print Server Review

Netgear FR114P Firewall Cable/DSL Router with Print Server
Average Reviews:

(More customer reviews)
I read the other reviews here with some dismay before I bought this unit. I decided to go ahead with the purchase because I had spent a lot of time researching router/switch combos with print server capability and true SPI firewall capability. There are not a lot of reasonably priced options out there. In summary this unit has performed like a dream. I had two PC's, a NIC laserprinter, and a parallel port printer (via print server) all plugged in, configured with my DSL service, and all up and running in less than 30 minutes. Please note that BEFORE I purchased this unit I made 3 separate "pre-sales" calls to Netgear tech support and received what I considered to be good information in each instance (I even placed a call at 3am one morning to check if they really were 24/7). Read the installation guide from cover to cover BEFORE you actually DO anything and you will probably find (as I did) that this is a no-brainer deal.

Click Here to see more reviews about: Netgear FR114P Firewall Cable/DSL Router with Print Server

The Netgear FR11P ProSafe firewall/print server is a true, broadband-capable firewall that provides you with the utmost in business-class security--Denial of Service protection and intrusion detection using Stateful Packet Inspection (SPI), URL access and content filtering, logging, reporting, and real-time alerts. VPN pass-through maximizes network security with access control and encryption. And a built-in print server removes the bottleneck of a dedicated PC print server and supports multiple print jobs simultaneously. With four auto sensing, switched LAN ports and Network Address Translation (NAT) routing, up to 253 users can access your broadband connection at the same time. There's even a 100 Mbps WAN port for future high-speed broadband services. Smart Wizard and Install Assistant get your network up and running in minutes, and a complete antivirus software bundle is included at no extra cost to shield your network with additional protection.

Buy NowGet 12% OFF

Click here for more information about Netgear FR114P Firewall Cable/DSL Router with Print Server

Read More...

Cisco-Linksys WPS54GU2 Wireless-G Print Server for USB 2.0 Review

Cisco-Linksys WPS54GU2 Wireless-G Print Server for USB 2.0
Average Reviews:

(More customer reviews)
After reading the mixed reviews for this, I still decided to try the Linksys Wireless Print Server. Although this is more expensive than the wired print server, I thought that it may be nice to locate my printers (one is USB and the other is parallel/USB) and wireless router in different locations. Neither printer is multi-function. I first tried a "wired" Linksys print server, but was unable to connect (2) USB printers using a hub - plus the price of the print server and the hub was nearly the same as the wireless device.
So far so good, but there are some things that I suggest you do when installing this device. These are based on personal experience, which has been a process of educated trial and error. An IT professional may do things differently, but if you were an IT professional, you probably wouldn't be reading these reviews. My network is almost entirely Linksys components (wireless router, wireless adapter, and print server), although I am using the network cards that were pre-installed with those computers that are hard wired to the router.
First, disable your firewall. This will allow you to test the compatibility of the printers, the network, and the print sever without the extra component to worry about. Once everything is up and running, you can enable your firewall and tweak any networking restrictions at that time.
Secondly, when configuring the router (which is the first step), you will need to have this "wired" to your router. This is part of the instructions, and should not come as a surprise. However, make sure you leave this "wired" until you have installed the print server drivers and software on all your networked computers. The install utility seems to have trouble finding the print server if you have disconnected the hard wire connection, even if the print server lights indicate it is already on the wireless LAN.
Thirdly, if you are using MAC address filtering, temporarily disable this. One you get the print server set up and running, you can find its MAC address using the web utility or the BI-admin utility, and then restore the filtering after adding the print server. However, if you want to use the web based configuration utility (like you use with your router), please follow the instructions in the following paragraph.
Fourth, once you have installed everything per the instructions, I recommend the following: give your print server a fixed IP address on your network (e.g. 192.168.1.171). My experience is this: If your router uses DHCP to assign IP addresses to your networked computers and servers, the print server does not always communicate back to the router, and your print server will sometimes "disappear" from your network after computers have been turned off and on. Something to do with the order the computers and servers are turned on. Setting this to a fixed address has cleared up those problems for me. Also, because the print server's address is fixed, you can access the web based configuration utility by typing in the same IP address each time.
Fifthly, find the MAC address using the web based or BI-admin utility. Now, if you are using these, reinstate your MAC address filtering, adding your print server's address to the allowed list.
Sixth, test and test again. Reboot your computers and unplug and re-plug your print server. Send documents to all your printers from all your computers - not just printer test pages. Print actual documents from a "Wordpad" or similar program.
Seventh, enable your firewall, remembering to enable access to your print server at the fixed IP address used above.
Eighth, test again just to make sure. If it doesn't work now, you know it's the network settings of your firewall.
This has seemed to work for me.


Click Here to see more reviews about: Cisco-Linksys WPS54GU2 Wireless-G Print Server for USB 2.0

The Linksys Wireless-G PrintServer for USB 2.0 lets you connect a USB or parallel printer (or both!) directly to your network, eliminating the need to dedicate a PC to print sharing chores.Using a PrintServer frees up your "print share PC" so you don't have to leave it on all the time.It also removes the printing bottleneck, and sets your PC free to do more useful work.Connect the PrintServer directly to your network by 10/100 Ethernet cable, or wirelessly over 54Mbps Wireless-G (802.11g).The wireless option lets you put your printers wherever you want to, without having to run cables.Whichever way the PrintServer is attached to your network, both your wireless and wired PCs will have access to it, and the printers it's connected to.And if you don't use wireless for general networking in your office, you can still use the Wireless-G connection in ad-hoc mode to print from visiting Wireless-G and Wireless-B PCs.The USB port is compatible with USB 1.1 printers, as well as printers that support the new high-speed USB 2.0 specification for even faster throughput.There's also a separate port for a standard parallel printer.For even more versatility, you can connect two printers, one to each port, and send your documents to whichever one is most appropriate for each print job.A user-friendly Setup Wizard makes installation easy, the compact case fits anywhere, and the three megabyte print buffer size handles even large graphics-intensive print jobs.Let the Linksys Wireless-G PrintServer for USB 2.0 bring efficiency to your printing tasks.

Buy Now

Click here for more information about Cisco-Linksys WPS54GU2 Wireless-G Print Server for USB 2.0

Read More...

Arkview USB 2.0 10/100 Ethernet USB 2.0 Print Server (1 Port) PC/MAC Review

Arkview USB 2.0 10/100 Ethernet USB 2.0 Print Server (1 Port) PC/MAC
Average Reviews:

(More customer reviews)
I read all the good an bad reviews on this topic. Basically, it seemed that if people had a popular printer it supported, they were very happy. If not, it didn't work and they were unhappy.
I went through the process of trying to make it work with an unsupported Lexmark Laser printer. The setup software could see the printer (through my wireless network and the printer USB port, it could see which model it was) But it didn't want to install.
About to give up, I pulled out my old AirLink APSUSB2 printer server instructions. The process worked, but I believe you will have to set up a fixed IP address to go through this process. Make sure the fixed ip is above your router allowed HTPS list of address, and that it is a trusted IP on your home router/firewall.
After you have configured a fixed IP through Arknet's "Networking USB Server setup software," you do these basic steps for Windows XP:
In "Printers and Faxes" window, select Add Printer. Click Next
In the local or network printer window, select local printer, but don't select "automatically detect and install....". Click Next
In "select a printer port" select create a new port. In the pulldown, select Standard TCP/IP port. Click Next
A Standard TCP/IP port wizard comes up. Click next
In the "Add Port" window, Enter the IP address you have set the server to as discussed above, for example 192.168.150.254
Put in a port name. I overrode what defaulted tere and used port1. Click next
Under the "Additional Port Information Required" window, select the "custom" choice and hit settings
In the "port Settings" box brought up, leave the port and ip as is, change the radial button from "raw" to "lpr", and put your port name (port1) in the Queue name entry box. Select OK
You will be be brought back to the additional port information reqd screen. Hit next. Then Click Finish, to finish the port wizard.
Next, you will get the install printer software window. Hopefully you printer is already there and available through Windows XP (mine was). Otherwise you might have to access some driver files. Click next
I the "use existing driver" box, I selected existing driver and clicked next.
Under name your printer, you can change the name and choose whether you want it to be the default printer. Next
Then you can print a test page, and complete the installation. If the test page doesn't work, try it one more time after the installation completes.
I have little/no experience with later windows products, and so don't know if all these steps are easily doable in these products.
But it worked on XP and surprised me when it did. Thanks, Airlink, for providing the instructions for this workaround that Arkview didn't.


Click Here to see more reviews about: Arkview USB 2.0 10/100 Ethernet USB 2.0 Print Server (1 Port) PC/MAC

Arkview-Feets palm sized 1-port USB 2.0 Print Server allows any networked computer to share a USB printer. It complies with USB 2.0 specifications (backward compatible with USB 1.1 spec.), and provides users with an auto-sensing Ethernet port that works with either 10Base-T or 100Base-T networks. This unit also supports multiple protocols and multiple operating systems, ; ; The built-in web management feature provides more convenience by allowing the user to configure, monitor and even reset the print server via a web browser. This eliminates the need to place the printer right next to the computer. Print jobs can be sent to a printer in the same office. ; ; Features; Easily connect your USB printer to a network; Allows multiple computers to share one USB printer on the network; Print from any computer on your network; Supports DHCP Client and multiple network protocols; 10Base-T / 100Base-T auto-sensing; Supports Telnet and Web Management software; ; Specifications; Network Cable Length; 6 Feet; Network Protocol; IPX, TCP/IP, NETBUEI, APPLETALK, LPR, smb (Over IP); Cable Type; CAT5; Network Interface; 10/100Mbps RJ45; Printer Connection; USB 2.0, USB 1.1; Standards; IEEE 802.3 10Base-T; IEEE 802.3u 100Base-T; USB 2.0; Management; Web Based-UI, Networking USB Utility; ; Requirements; Windows 2000/XP/2003/Vista; Mac OS X; Printer with USB connection; Printers:; ; Most printers with USB connections are supported; Network environment:; ; 802.11b/b or 802.11n Wireless networks; 10/100Mbps networks; ; Package Content; 1 x 1-Port USB 2.0 Print Server; 1 x CAT5 Patch Cable; 1 x Power Adapter ; 1 x Installation CD; 1 x User Manual;

Buy Now

Click here for more information about Arkview USB 2.0 10/100 Ethernet USB 2.0 Print Server (1 Port) PC/MAC

Read More...